Machining Early A Body Brake Rotors came up as a result of a Region member needing to replace front discs on an aftermarket disc brake conversion kit from Scarebird. Scarebird made the kit to fit 79-85 Eldorado discs and Celebrity Calipers inside the small 14 inch Dart/Valiant/Cuda wheels.
The Caddy discs come with a 4.5” bolt pattern so they must be drilled with a 4” inch wheel bolt pattern to fit smartly to the early Dart/Valiant/Cuda wheel hub. The Scarebird kit provides a paper pattern to cut out and mark (using a centerpunch) hole locations.
If one wants to maintain a decent balance of the disc it’s best to locate the new holes exactly centered between the existing 4.5” bolt pattern so the Scarebird pattern is modified to allow that method:
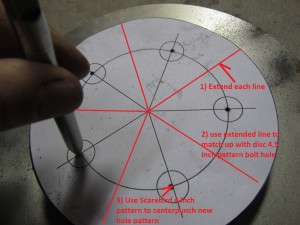
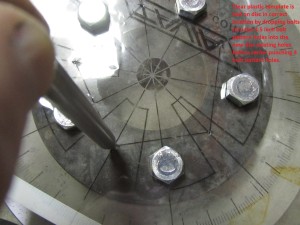
In order to lay the pattern on the disc in the right location it helps to turn the pattern into a clear template with holes cutout to drop/guide/align the pattern with the existing 4.5 inch disc bolts:
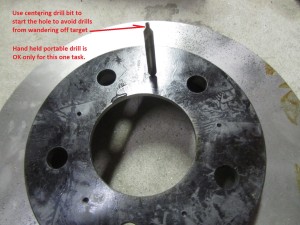
After center punching use a centering drill bit to start the hole and avoid wandering of the drilling bits. A hand held portable drill is best for this task to allow your best vision of the centerpunch hole and centering drill target:
At this point it’s necessary to use a drill press which has been slightly modified with stops & table extensions to handle the drilling tasks using clamps and angles:
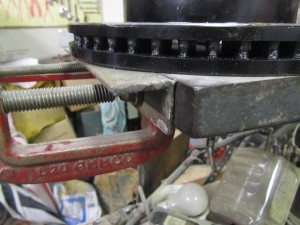
Location of these are done & adjusted until the rotor can be set up against the angles and each of the 5 holes aligned with the first step 1/8” drill. The disc rotor is rotated several times & each hole checked to insure angles are properly located:
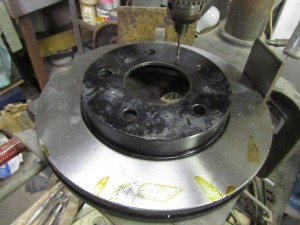
Holes are drilled using drills in the following diameter increments: 1/8”, ¼”, 3/8”,7/16”, ½” & 9/16”. Notice that the finish hole size is oversized relative to the 7/16” wheel stud size. At 9/16” drill size the holes are similar to the factory wheel hole size. Factory tolerances allowed a wide variation between stud size and wheel hole size.
Before using the ½” drill it’s best to trial fit the disc on a hub to see how much the holes misalign and in which direction so you can make an adjustment to the hole location using a round file before making the plunge cut with the ½” drill:
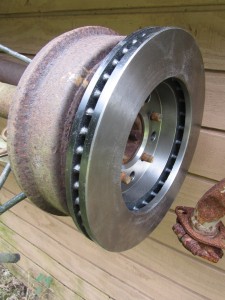
The above fitting was done on a rear axle since the hub drill pattern and centering hub are the best for using as a guide for determining accuracy of the hole spacing.
Rotors for the 79-85 Eldorado were purchased from NAPA and arrived in a box marked as follows:
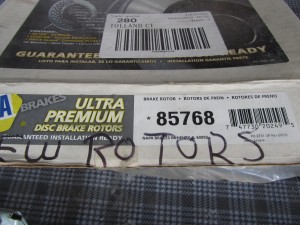
You will find that recently they changed the numbers to 4885768.
You are not done yet however with the machining; most new rotors (or drums) are not machined good enough as received off the shelf and so after you have done your drilling it’s best to bring the rotors in for turning to true them up so you only have to do the brake assembly work, once, to get the discs to not wander when rotated.
Vector files for the above text and photos:
MachiningBrakeRotorsForEarlyAMopar (.doc)
MachiningBrakeRotorsForEarlyAMopar (.pdf)